Creating Landscapes
Naturally, the first stage of making a map is to create a landscape. Decide where to place mountains, plateaus or hills, and where to have vast seas or rivers winding their way through the scenery. (To make this part easier, you can sketch your future map on paper first.)
When you have finished this part, click on the  button in the editor interface. This will open a relief generation window where you can add basic landscape elements to your map
button in the editor interface. This will open a relief generation window where you can add basic landscape elements to your map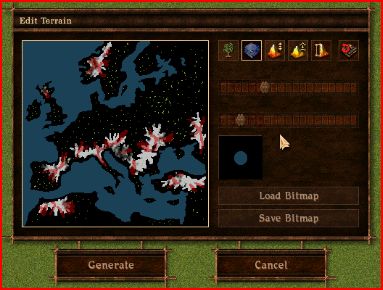
Note that left-clicking adds a relief to the map while right-clicking removes it.
You can also open existing Bitmaps ( .bmp's) by selecting Load Bitmap. The bitmaps have to be in the folder UserTerrain.
The Save Bitmap function does not always seem to work. So a way around this, is after you created a bmp, you go to the folder Data in your cossacks directory and you copy the temporary saved bmp and place it in the folder UserTerrain. If you want an already made .bmp have a look at our download section
Note that with the import of bmp's you can virtually create any realistic landscape. ( For example's look at the lcn map packs)( http://clan-elbrus.nm.ru/seamap.html )
Or have a look at this great example by [HWK]FoxHound of how to create your own bmp's outside the editor:
(It is for AC FB, but its the same for Cossacks I)