Weather Effects
Under Construction
Most people may not realize, but the Cossacks II engine can handle weather effects. Though not set up yet, it is not so hard to get it in the editor for usage on your maps.
So how do you get them in game?
First off all you will need to download the Kangaroo tool to work with the 3D .c2m (Cossacks 2 Models) format. You can find the tool in the upload ~ download section
I added a snow.c2m in the .rar file to play around with and for the purpose off this tutorial. I will not explain how to create models in 3D Max, because that is beyond the scope of this tutorial, there are plenty of tutorials on the interweb explaining how to create "stuff" in 3D Max, but for those that are adventurous, you will want to download the .c2m exporter plugin for 3D Max. It works for 3D Max 6 and 7. I do not believe it works for later versions ( Max 8 - 9).
Once you have downloaded the Kangaroo tool it is time to populate the world with Kangaroo's...
You can drop the entire content of the Data folder into your Cossacks II\Data folder. As always when modding, work on a copy of your game.
Part 1: Setting up the snow particles.
I. Run the Kangaroo_Release.exe.
II. Load the model.
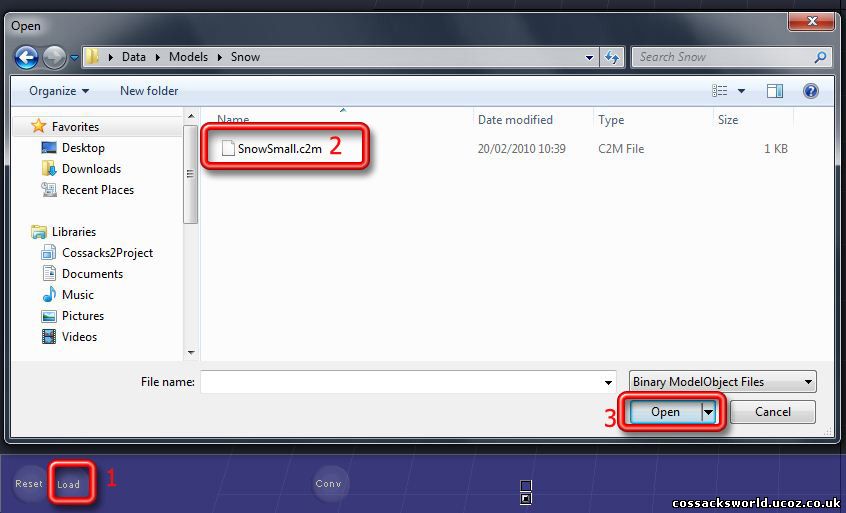
1. Press the Load button
2. Find the Data\Models\Snow\SnowSmall.c2m.
3. Press Open
Once loaded you will see small particles falling down in the scene. They don't look much like snow yet, but let's work on that.
III. Load Textures
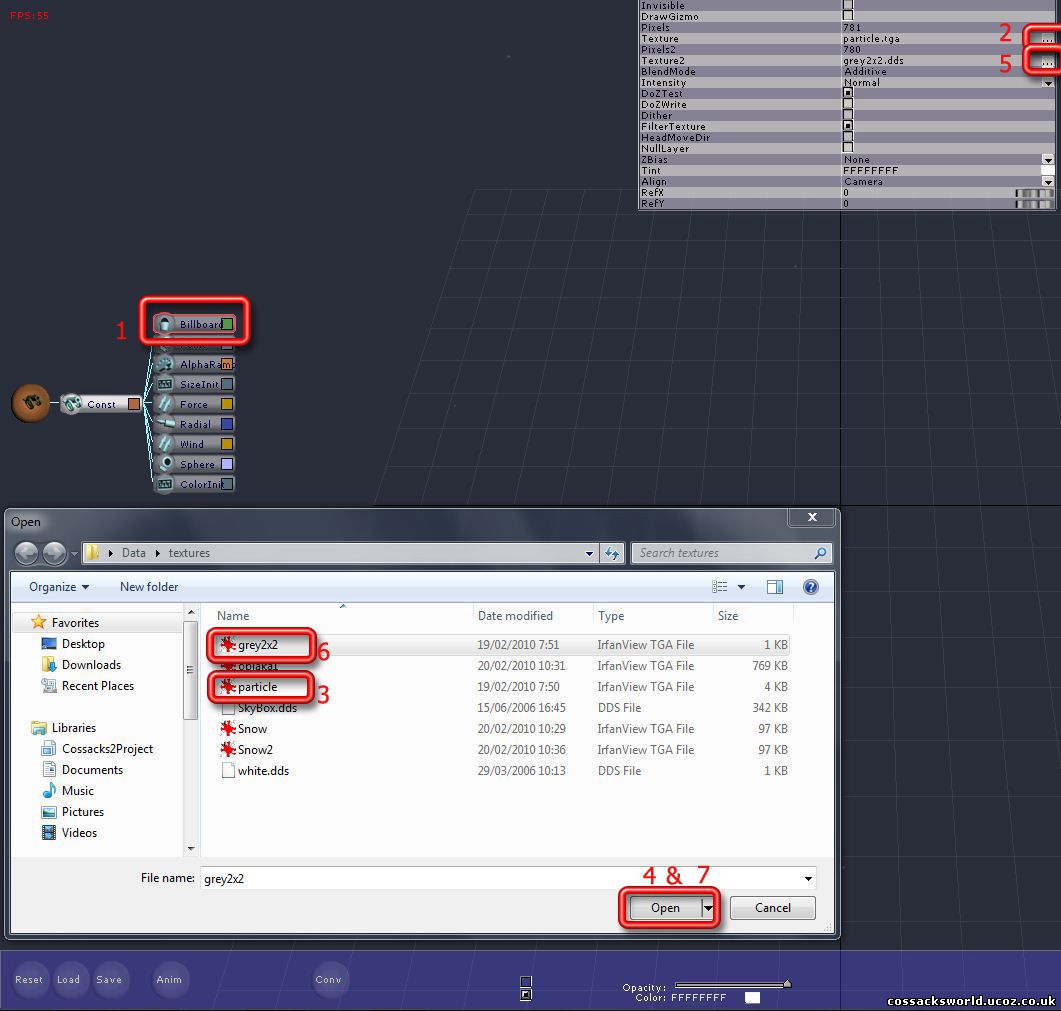
1. Select the "Billboard" Controller
2. Hit the ... to load up a texture
3. Select the particle.tga texture from the Data/texture folder
4. Hit open
5. Hit the ...for the secondary texture
6. Select the grey2x2.tga texture
7. Hit open
Note: CII Engine.exe can only handle .bmp, .jpg & .tga as texture formats, so no .dds
IV. Change Size of the snow flakes
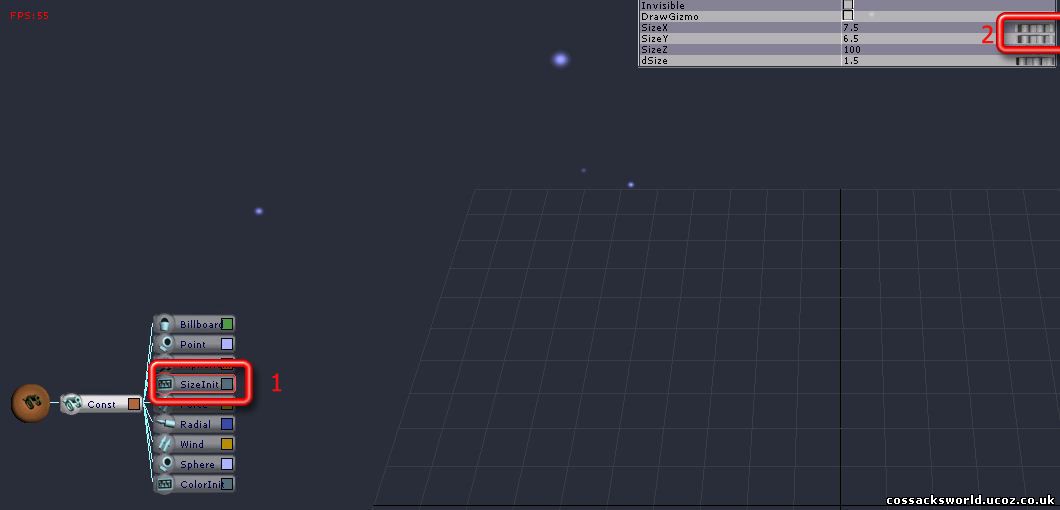
1. Select the Size Init Controller
2. Use the sliders to increase the size of the snow particles.
V. Change Color of the snow flakes
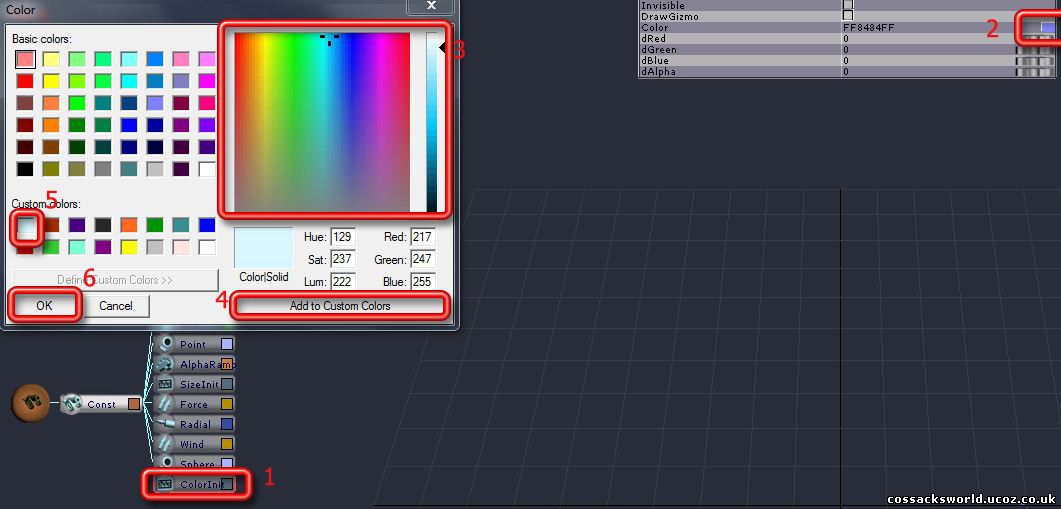
1. Select the Color Init Controller
2. Click on the Color Sample
3. Mix your custom color. Take something white/blue for snow
4. Add it to the custom Color list
5. Select it from the custom colors
6. Hit Ok
VI. Other Settings
There are other various settings that one can change trough the controllers like the velocity of the wind, the size of the area the snow falls, but for now let's just stick to what we got, you can always try out more later.
VII. Save the Model
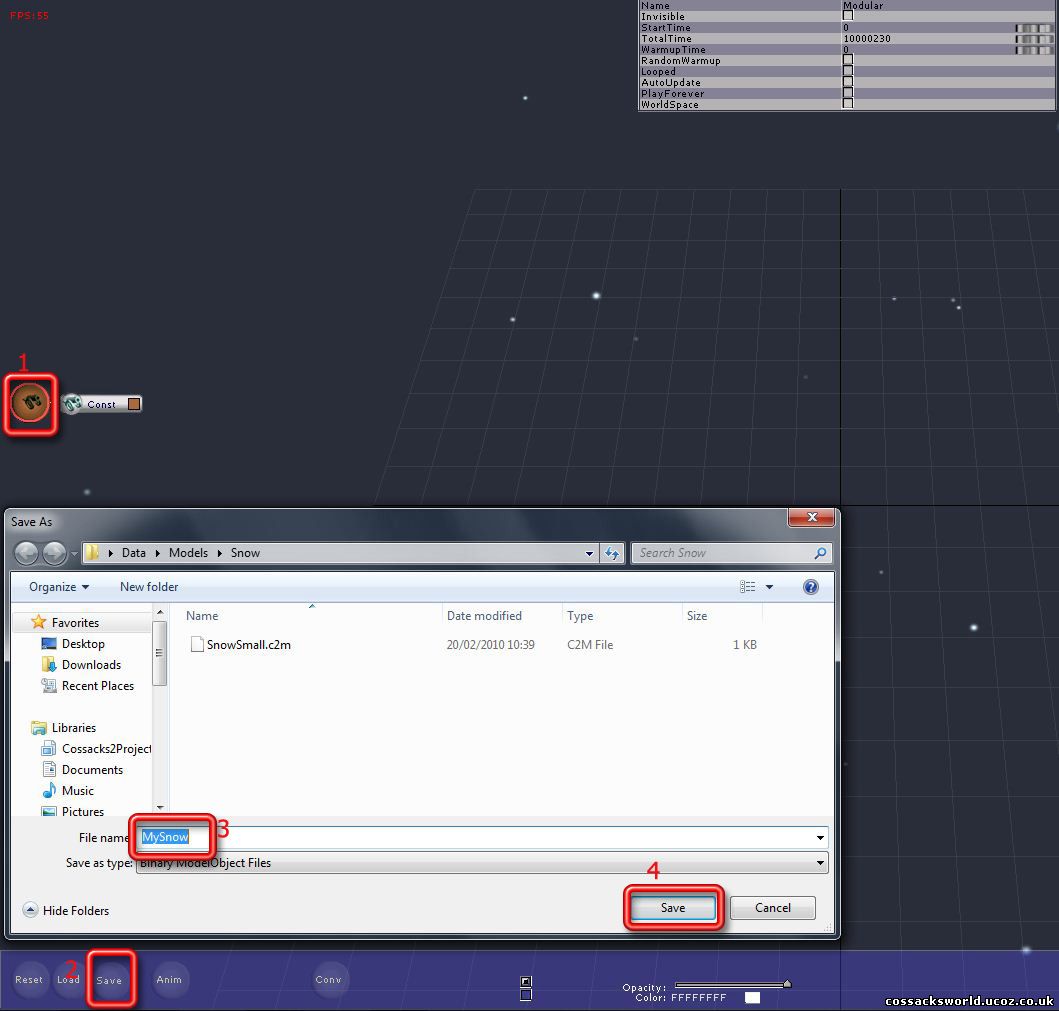
1. Select the Main Controller
2. Hit Save
3. Give the baby a name, let's use "MySnow" as I will use it in the rest of the explanation.
4. Save
Part 2: Get it in game
2.1. First off all we need to create an MD file for this. Just copy an existing one, clean it entirely out and replace with the following strings:
NAME MySnow(EVA) / Name it, to call on in the NDS file ( EVA: Editor VArious)
MESSAGE †¨«®©_¤®¬
ICON B_Do1
USERLC 0 UnitsG17\AusOf SHADOW -127 -148 / Just a ghost graphic which doesn't exist
LOCKPOINTS 1 10 10
CHECKPOINTS 1 10 10
SETANMPARAM -127 -148 1 0
LOCATION -127 -148 826 612
#STANDLO 9 1 0 0
LINESORT #STANDLO POINT 127 148
GEOMETRY 1 199 32
LIFE 999999
PRICE 1 WOOD 1
RANGE 18 6 22 0 0 9
MATHERIAL 1 IRON
BUILDSTAGES 1
RECTANGLE 0 40 250 200
EXPLMEDIA BUILDING 5
BUILDBAR 3 61 55 48
3DBARS 1 205 484 142 382 178
COSTPERCENT 10
SLOWDEATH
INFO 3 12
VISION 4
BUILDING
NOTSELECTABLE / Can't be selected this way
INVISIBLEONMINIMAP / Will not show up on minimap this way
IMMORTAL / Cannot be destroyed this way
!TEMP 180 1.0 Models\Snow\MySnow.c2m Models\Snow\MySnow.c2m / Here we are adding the snow model.Twice!!
ADDHDIR #TEMP 0 160
ANMEXT #STANDLO #TEMP 0 0 0 1.0 2000 /"External Animation" on the #STANDLO animation as set up above
[END]
Or if you are lazy get the MD right here.
2.2 Save the MD and lets name it MySnow(EVA).MD
2.3 Store the MD in Data\UnitsMD\Editor\MySnow(EVA).MD
2.4 Enable the MD by adding the following line to Data\nmlist.txt:
UnitsMD\Editor\MySnow(EVA)
2.4 Set up a description for the md in Data\Text\MdList.txt: (CAPITALS)
UNITSMD\EDITOR\MYSNOW(EVA).MD My Snow
2.5 For this we will also create a new NDS file:
- Take any NDS file , copy it and clean it entirely out.
- Add following lines:
[MEMBERS]
MySnow(VAR) MySnow(EVA) / Calling on the MySnow(EVA) MD Name here and naming it MySnow(VAR) where VAR is the nation abbreviation for VARIOUS.NDS as we will define later in Nations.lst
[COUNTRY]
VARIOUS 2
#WEATHEREFFECTS
MySnow(VAR)
[END]
MySnow(VAR) MySnow(EVA) / Calling on the MySnow(EVA) MD Name here and naming it MySnow(VAR) where VAR is the nation abbreviation for VARIOUS.NDS as we will define later in Nations.lst
[COUNTRY]
VARIOUS 2
#WEATHEREFFECTS
MySnow(VAR)
[END]
Or if you are still being lazy, get the nation nds here
Save this new nds file in Data\Nations\Editor\Various.NDS ( just create 2 new folders for it)
Nearly there, one more thing to do:
- Enable this new 'nation':
Open Data\Nations.lst with visual C++ or simply with notepad and add one number to the top ( 14-->15) and following line
VARIOUS Various Nations\Editor\VARIOUS.NDS #TX 9 10 (VAR) (VAR) /Name of the Nation, NDS[COUNTRY]Name,Path to NDS file and Nations abbreviation(VAR)
Save and done.
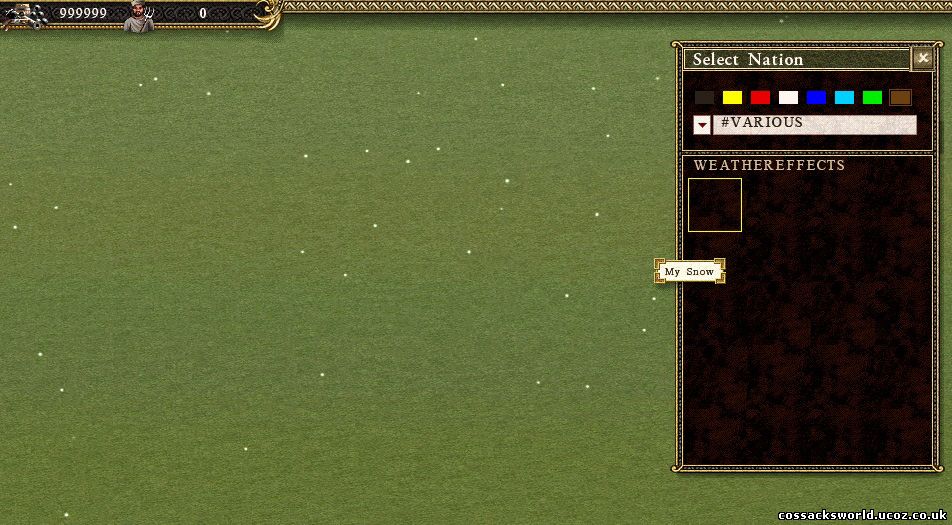
Part 3: Test
Run the game, go to editor, press P tab, select the new editor nations, select the neutral colour, select your new model and place it on the map. Should look a bit like this: