Random Map Params Editor
Under Construction
This menu is not used in the vanilla version of Cossacks II. It is used in Alexander to set up which type of terrain to generate for random maps mode.
It can be used in Cossacks 2 aswell, though it will need adjusting and additional changes to other files ( interface, samples, text descriptions,...).
Before you can actually 'use' & 'test' this menu you will need a modified interface which allows for using this mode, you will need samples aswell, ... so for more information on how to get the random maps working in Cossacks 2, I refer to the Random Mode page.
There are 3 subsections in this editor:
+Landscapes : here you can set up which terrain will be generated, not what is actually created on that terrain. The setup for the terrain ( relief & textures & objects) is done with Ex Terrain Editor. Here you set up the " where" a layer will be randomly created.
+StartPosition : slightly bad naming of this option, as it actually defines what a player gets on starting depending on the option added here ( how much peasants, mine's,...). It uses layers and samples. Samples are set up in the editor with the copy & paste function ( CTRL+C & CTRL +V ). All the options set up here will show up in the random map options menu.
+StartResources : to set up which resources are available in the random map options menu.
1. Landscapes.
Those that have read how to use the ExTerrain Editor, Surface Editor(insert link) and the inbuild editors in general, will be familiar with this menu. It uses the same type of rules & actions.
It is most unfortunate that only one type of terrain can be set up here, or I still have to discover how to get different types of terrain here. So far I'v only managed to change the existing one. You can add a new terrain type, but I don't know how to call on it from the interface.
First of all, try the Generate Button to see if it generates terrain.
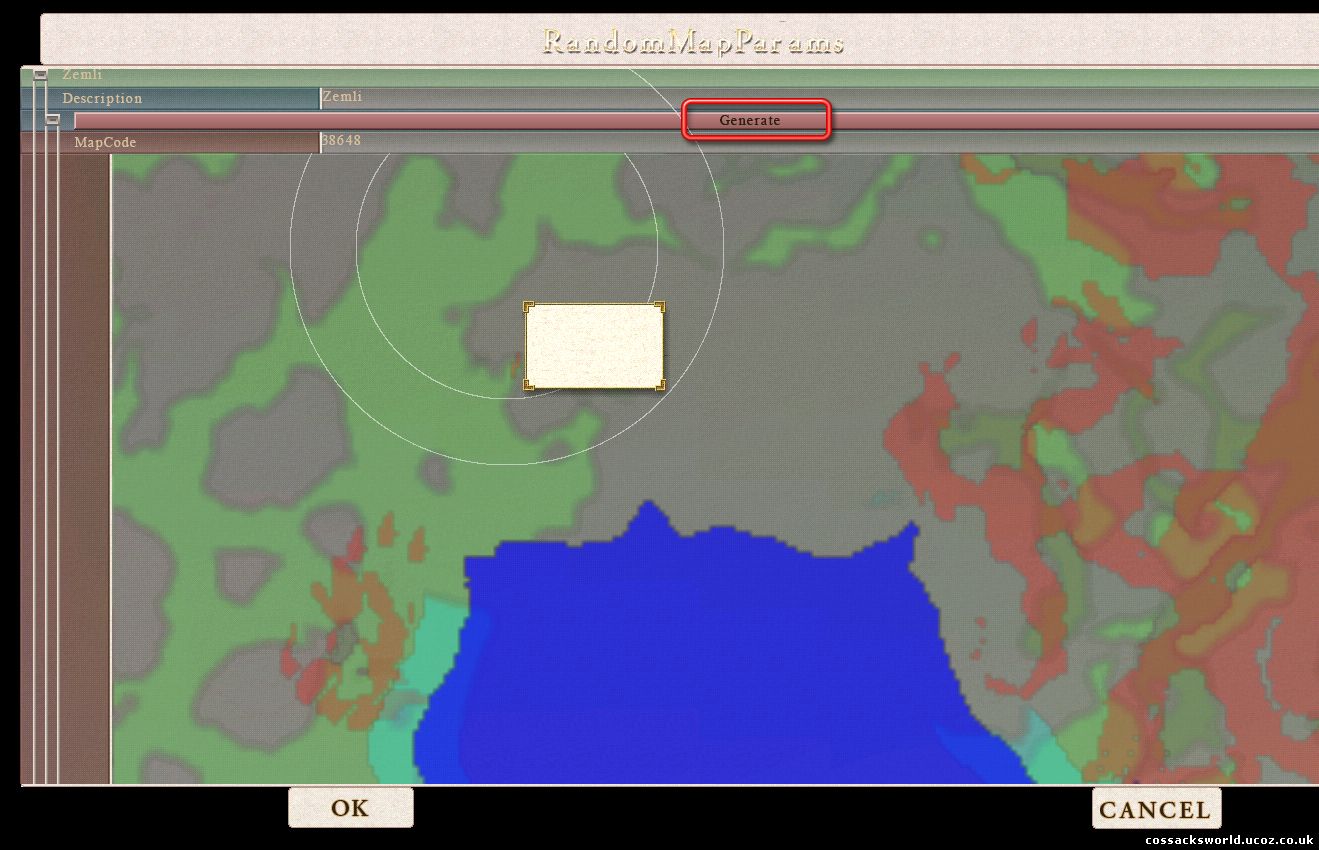
Note : If you do not see the colors of the layers, download this file and put it in your Data\Shaders\DeviceStates ´~ folder and restart your game.
Let's have a deeper look at one of the rules of these layers. Open the trees ( Les).
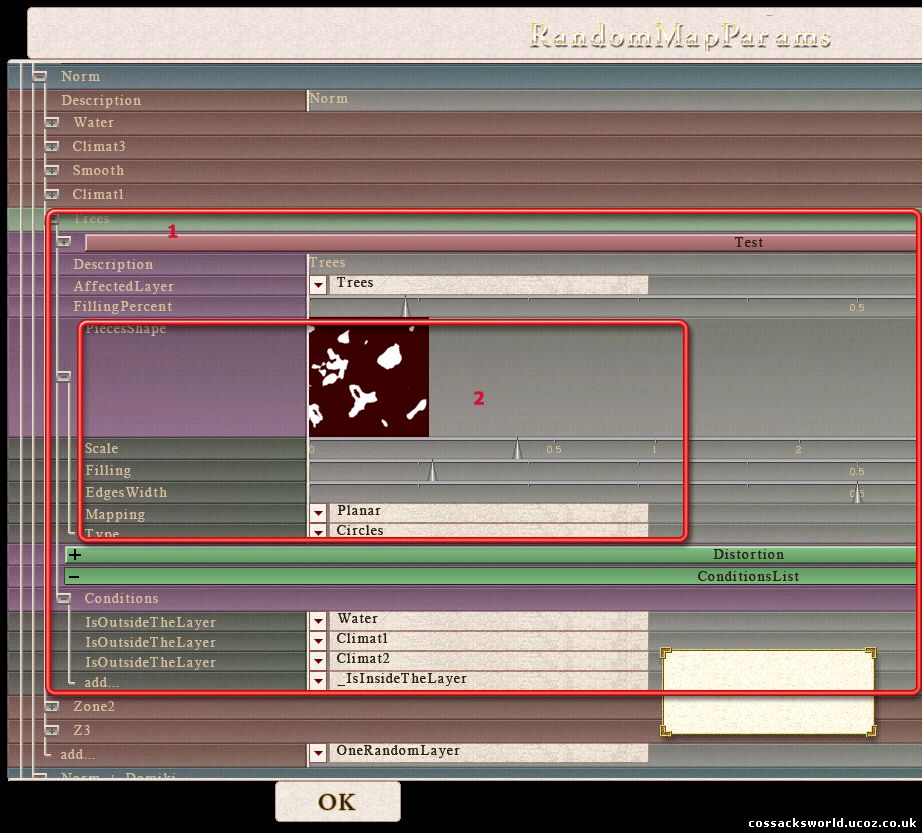
1. Use the test button to test after changes have been done to see if it works out alright.
2. You see a preview of where this layer will generate and in what form. Use the sliders next to Scale , filling & Edges Width to change appearance of the forests in this case.
What is actually drawn on this layer is setup in the ExTerrain Editor under "Relief" , the textures & objects also come from the ExTerrain Editor " Terrain" so this editor will only set up where the layers will be created.
The set up color of the layers and there names can be added with the Layers Editor. However, changing the names from the layers will reset all xml's in the data folder to the first layer from the drop list, so pay attention with this one. If you decide to use the Map Layers Editor to restructure the colors and layer names, then do that first.
2. Start Position.
Before you can use this menu, you should first create some samples in the editor. On how to create samples I refer to Basic Editor - Sprites - 5. Copy & Paste Terrain Features .
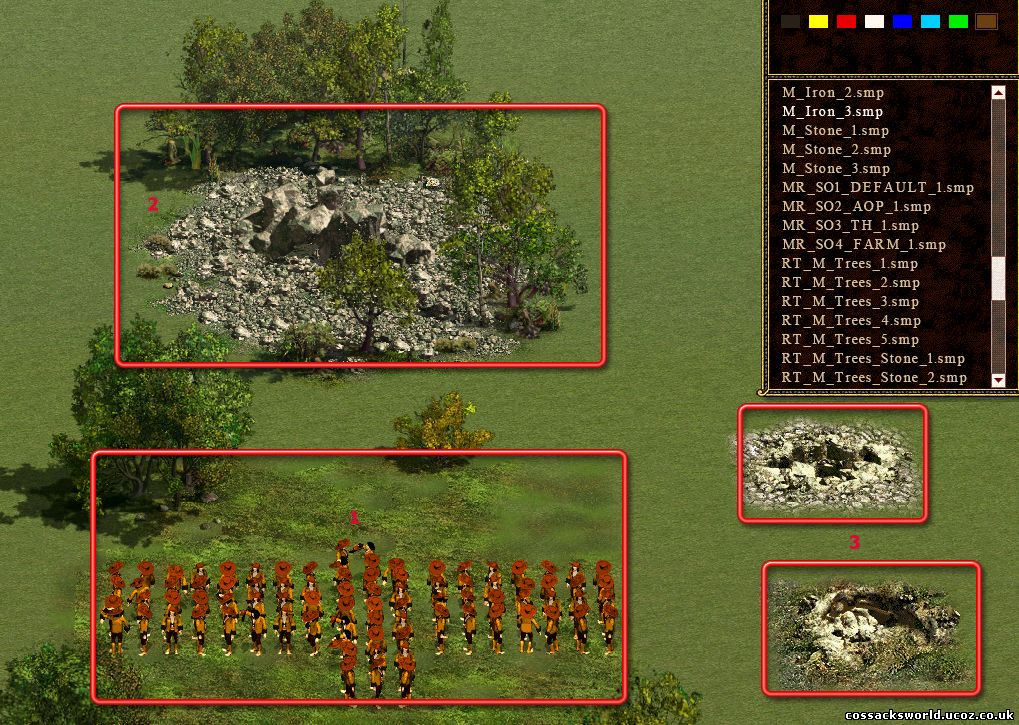
I suggest you create at least a sample with peasants (1) in it ( create under neutral colour), a sample with stones and/or trees ( 2 )and a sample with mine sprites ( 3 )in it. You will need much more samples for each option to create a bigger variety in start pieces otherwise it will always start with the same samples, but for now that should be enough.
Once you have created some samples, open up the RndMapParams editor and open up the + StartPositions.
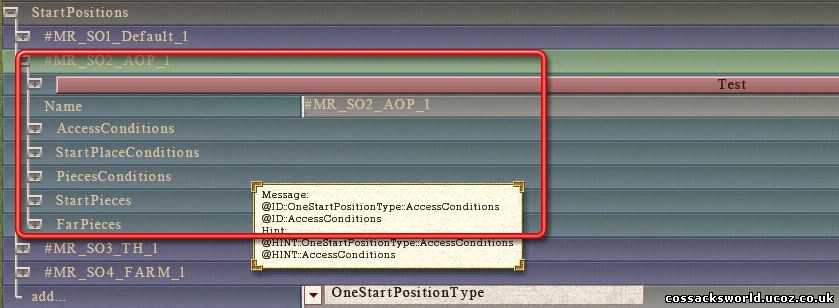
Fill out a name ( in this case MR_SO2_AOP_1 ~MyRandom_StartOption_2_ArmyOfPeasants_1 ) and add an entry for the interface display in one of the text files.
Next, add the Conditions:
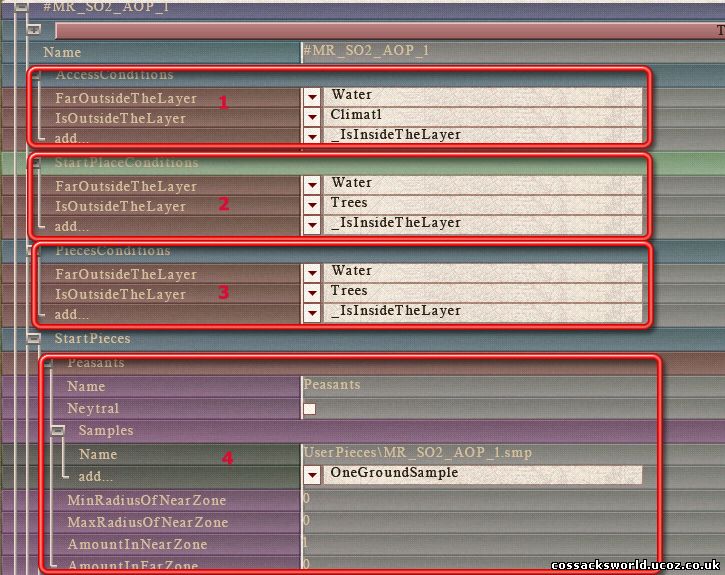
1. Hit the "Add" button and set up rules where the start pieces can be accessed. The layers referred to here are the ones as defined under + Landscape.
2. Hit the "Add" button and set up rules where the start places will appear.
3. Hit the "Add" button and set up conditions for the pieces.
4. Add "One StartPiece" and give it a name. Tick the neutral box only for samples which you want to appear as the neutral color ( brown ). Especially if any animals are created with the samples. ( Eg. Wood with deer in,...)
Open up Samples and "add" OneGroundSample, on the right hit the load button and direct it to your Data\UserPieces ~folder and select the sample you created earlier with peasants on.
You can add as many samples here as you like for a bigger diversity.
For peasants, leave the MinRadiusOfNearZone and MaxRadius to 0.
Amount in Near Zone is how many samples will appear. 1 in this case as all peasants are in one sample.
Note: the default options that have been set up are carried over from Alexander. The samples it refers to are obviously not present, so you will have to swop them out with your own if you want to use the default options.
Next do the same for your wood/stone sample and mine, only difference here is the radius of the zones bcause we don't want the mines to appear to close to the start position.
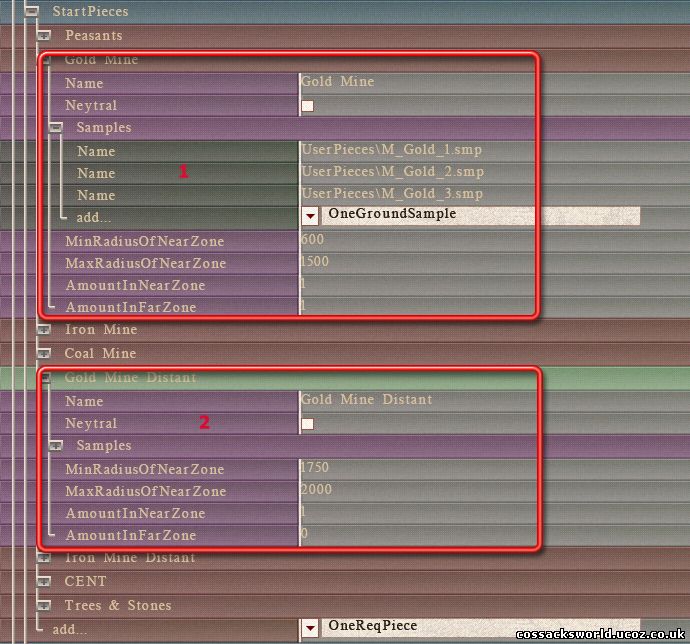
1. Use a variety of samples. Set up the Zones, eg
MinRadiusOfNearZone : 600 & Max : 1500
AmountInNearZone: 1 & inFar: 1
What this says is that one gold mine sample will be created in a radius from 600 to 1500 from the start position. One gold sample will be created outside this layer.
2. Similar, only different radius : 1750 & 2000. So this gold mine sample will be created even further from the start position.
So in total 3 gold mine samples will be created on starting with this AOP option for each player. ( so 3 * 6 : 18 goldmines)
Note : Remember, with ctrl + c & ctrl + v you can copy & paste start positions.
3. Start Resources.
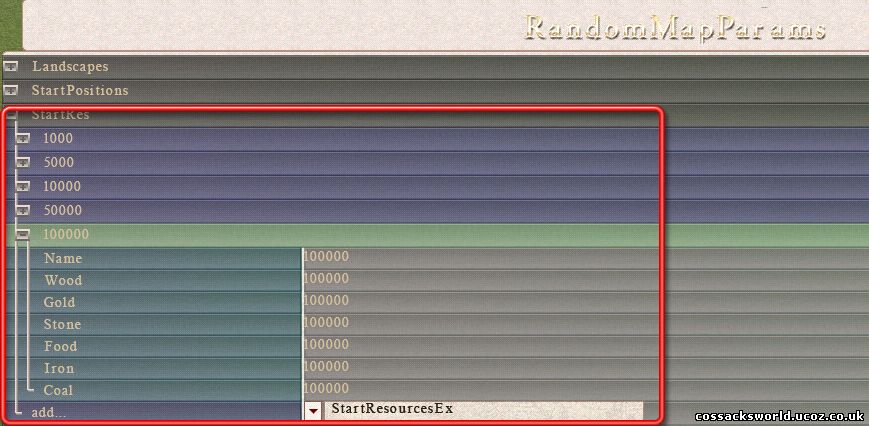
Fairly straight forward this one.
Hit the "add" button at the bottom to add a new option. Fill out the amount of resources you want players to start with.
A note about the name: what you fill out here will show up in the random map options menu. You can also give it a name like City, Empire etc... Make sure that if you write #VILLAGE here you also specify its name in one of the .txt files ( doesn't matter which one)
The changes done to the start positions & start resources in this menu are saved to Data\RandomMapDesc.xml