Textures & Factures
Under Construction
1. Textures
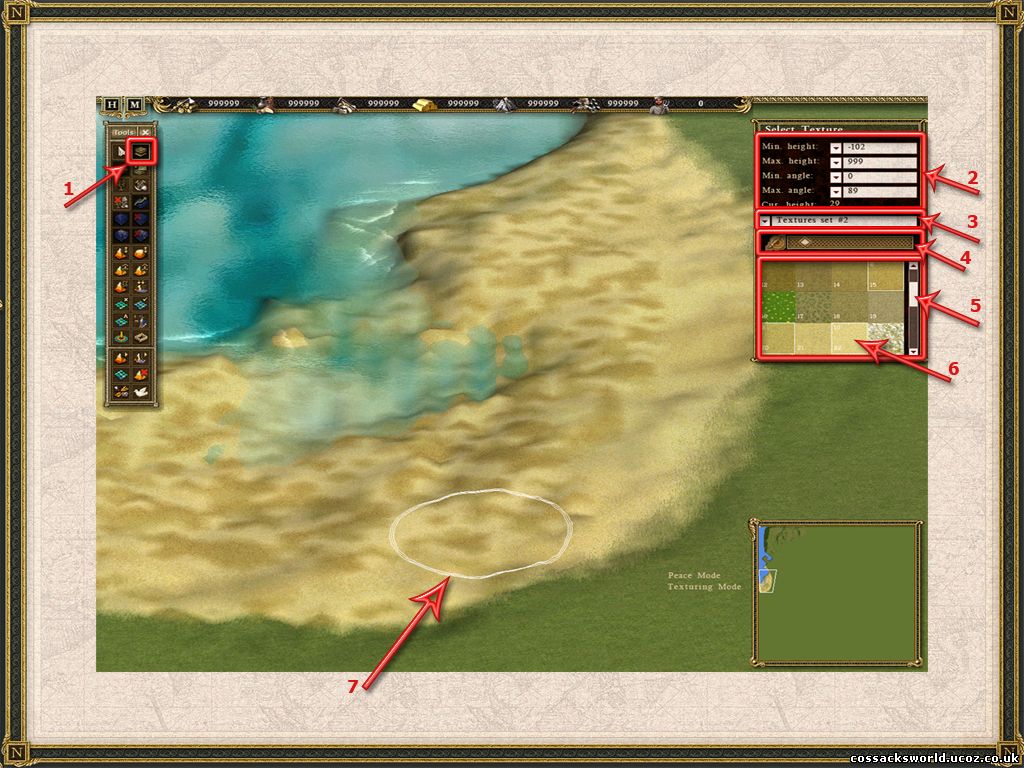
1. Select the texture tool or press F2.
2. Height settings to which the textures apply.
3. Textures sets to save custom sets.
4. Adjust the radius of the textures, use numpad keys 1-9 or use the scroll wheel on your mouse.
5. Use the right scroll bar to see all available textures.
6. Select texture. Hold down control to select multiple textures. Press shift to display the texture number.
7. Left click to apply the texture set to the terrain.
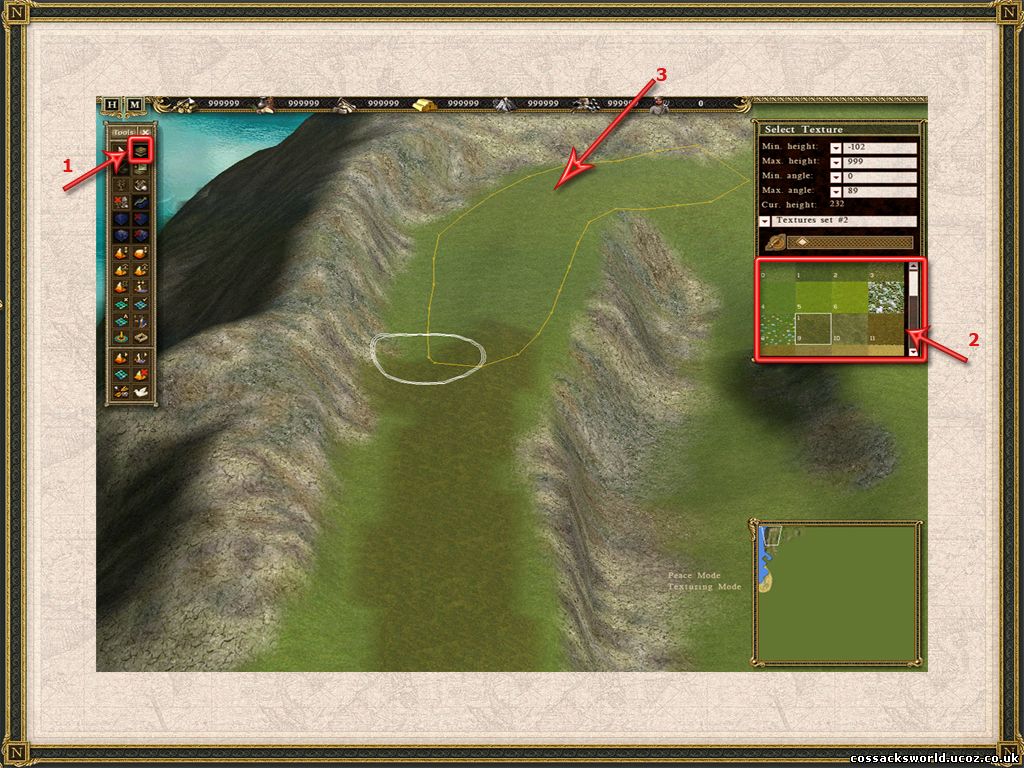
1. Select the texture tool or press F2.
2. Select the desired texture(s).
3. Hold down shift to outline an area and fill up with the selected texture.
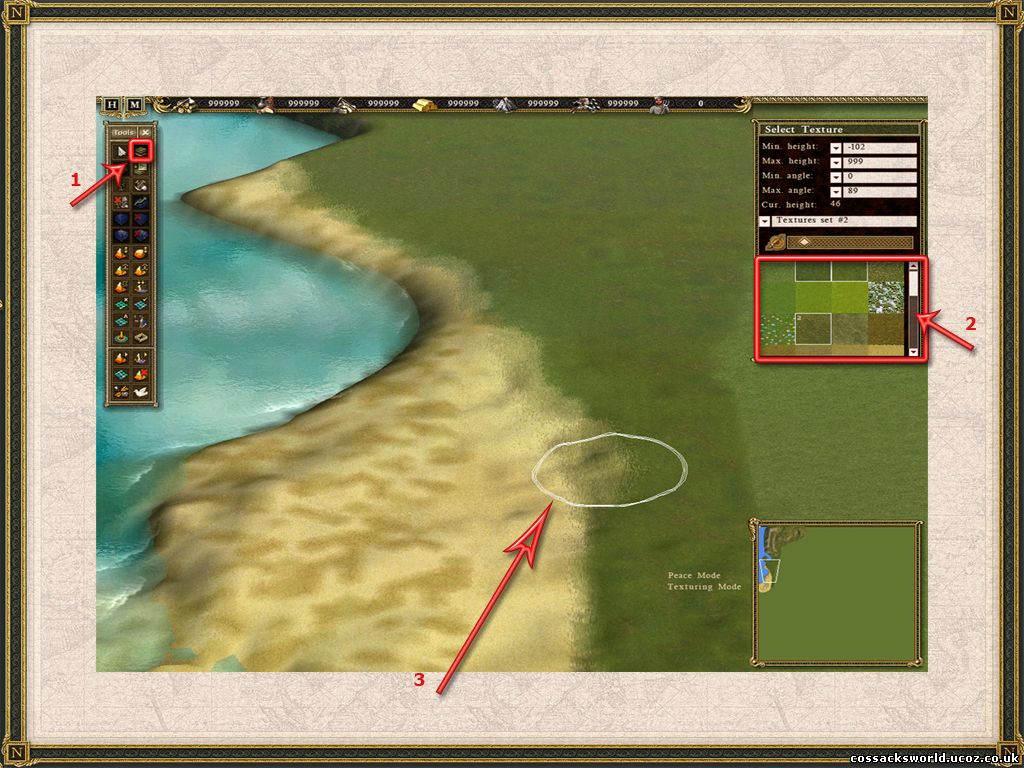
1. Select the texture tool or press F2.
2. Select the desired textures.
3. Hold down control while painting the edges of the already placed textures on the map to blend 2 sets of textures.
2. Factures ( detailed textures)
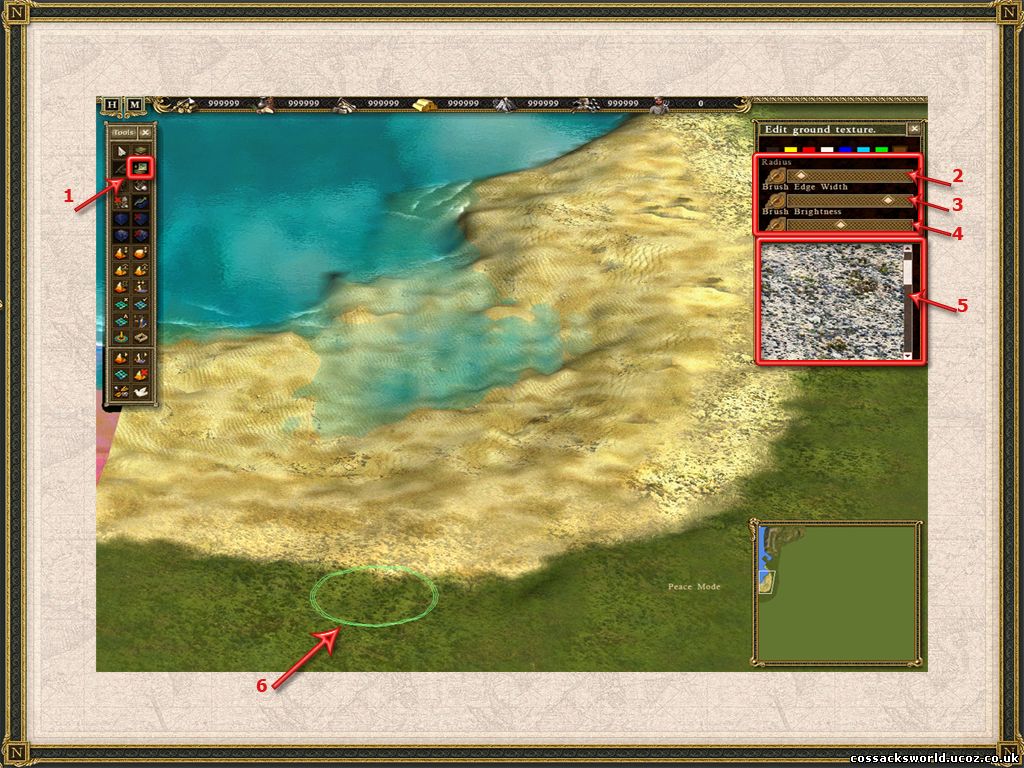
1. Select the facture button in the toolbar or press hotkey V.
2. Select the brush wide with the slider, numpad keys 1-9 or use the scroll wheel on your mouse.
3. Select the brush edge width with the slider.
4. Select the brush brightness ( for blending).
5. Select a facture for plains ( locked to horizontal)
6. Left click to paint.
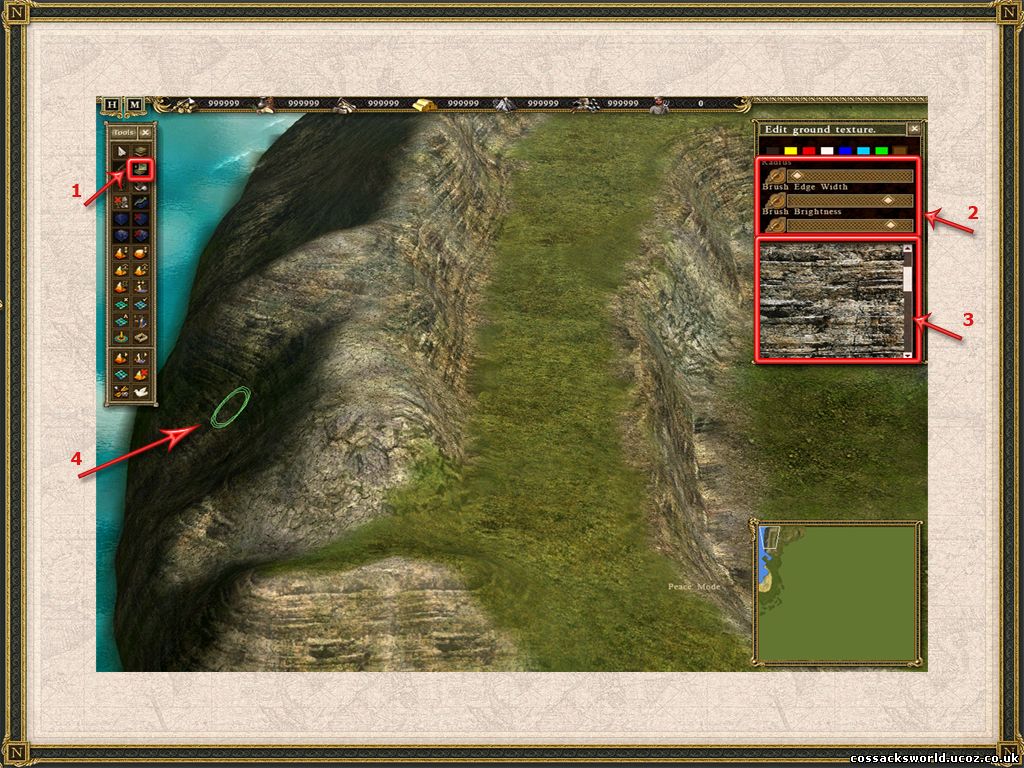
1. Select the facture button in the toolbar or press hotkey V.
2. Set the desired brush settings.
3. Select a facture for mountains (locked to vertical )
4. Left click to paint
Note:
- to delete factures set the brightness value to 0.
- to select a facture that is already present on the map, press ALT and select the facture while the facture menu is open, it will automatically select that facture.
- once factures have been painted, it is nearly impossible to adjust the terrain height due to the locking of certain factures.
Therefor it's best to paint facture's at a later stage of your map design to avoid having to redo large area's.
!!Save often!!