First Mod
1. Changing Nation Colours
Start off by copying your vanilla version ( patched 1.2) to your desktop. We will work here in case you get some serious errors.
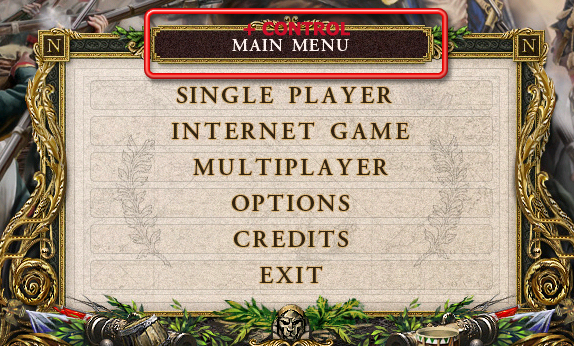
After it has copied, run the game, hit control + main menu and access the map editor.
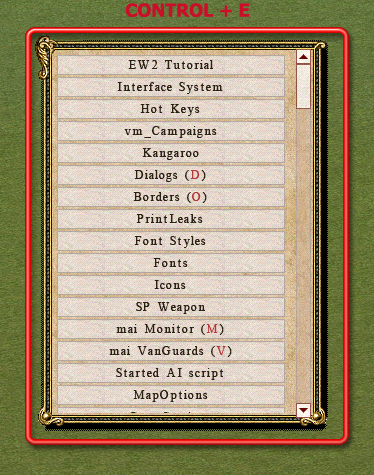
Press CONTROL+ E to access the list of ingame editors.
Let's start off with something easy. We will change the player's colours.
Scroll down in the list with editors and find the Engine Settings. Click on it and a new window will open on the right side of the screen.
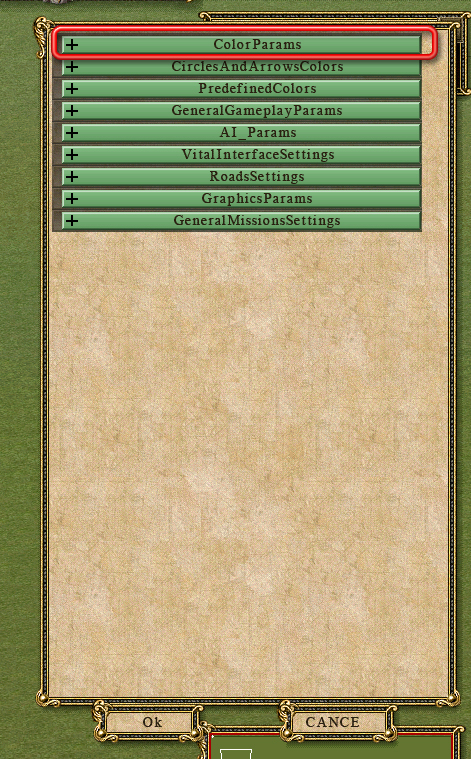
Expand the tree view (+) on the first menu Color Params. Scroll down to NatColor and hit the + to open.
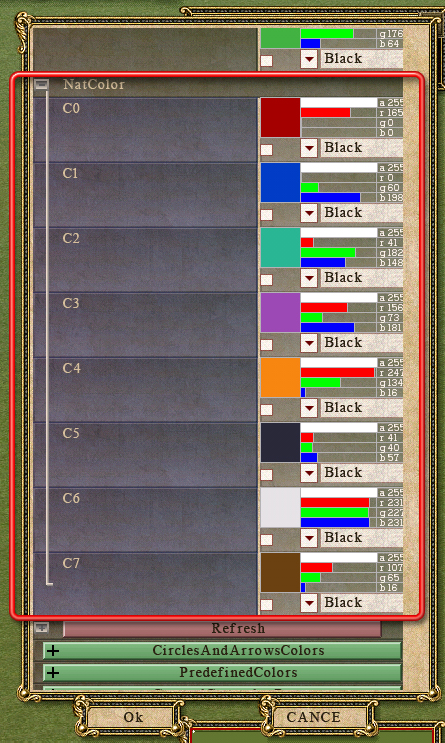
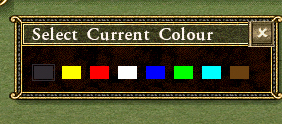
Use the a/r/g/b color sliders to adjust values and to achieve the desired color. You can also tick the box and use a preset color.
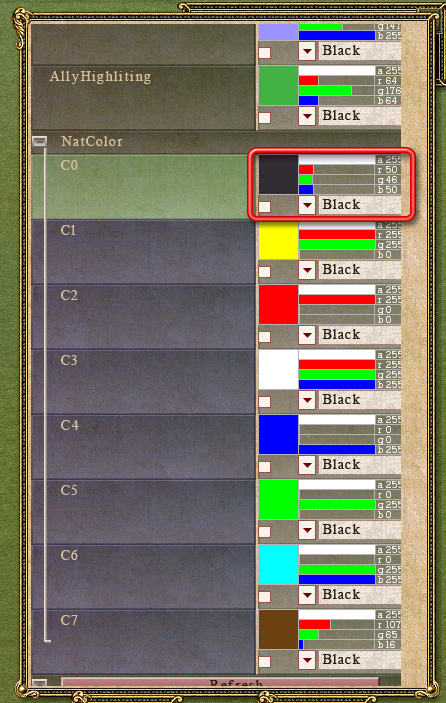
Scroll back to the top and hit Refresh ( the red bar). Hit Ok at the bottom. Exit the editor and go back to main menu. Load up the editor again to load the changes.
To distribute these changes the data is stored to Data\enginesettings.xml
Grats, your first small mod.
2. Adding new factures to the game.
Prepare your factures ( ground textures) in .bmp or .tga format. Here are a few samples to experiment with.
Put your factures in the data\textures folder . Either in the original Ground folder or just create a new one.
Fire up the game, go to editor, press ctrl + e and access the Factures editor. Scroll down to the bottom where it says "add..~one factureinfo". Hit on it and expand the view by hitting the +
Click in the box next to factureID, select the format (.tga, bmp) and direct it to your folder with factures.
Set the mapping option : planar for normal -vertical for mountains.
Hit refresh and press ok.
Go to the toolbar and you can immediately test your new facture's.
To distribute with your mod, facture settings are stored to data\factureslist.xml and evidently your textures\ground folder with the new factures in it.
3. Learning to use the dialogs editor.
There are 2 ways to access the dialogs editor, either hold down ALT and press on Main Menu, or start up the map editor and press control +E and select the dialogs editor (D) from the list.
Press numlock to get this screen fullsized and not offscreen.
Note: because the dialogs editor sometimes covers half of the screen you dont see what happens below it, so move your cursor to the extreme right edge of the screen and the dialog will switch to there so you see what happens on the left, and ofcourse left edge switches back to left edge.Or to hide the dialog menu, just press numlock key
The dialogs interface holds the setup for every button, screen, interface there is in the game.
From here you can create a whole new interface, new menu's, etc...
From here you can create a whole new interface, new menu's, etc...
But for now, let's start off easy.
First off all, everthing created or modified here goes in the DATA\Dialogs folder in .xml format or .dialogs.xml format. Don't bother editing the .xml's manually when you got this brilliant interface for it.
There's a ton of options and i may list the difficult one's later on, but for now lets try something easy to give a head start.
Select load and go to the subfolder "v", and select the M_MAIN.dialogs.xml, press the green V button to effectively load it. It will bring up the picture background and the buttons interface.
Expand the + view and go to childdialogs ( as explained earlier, clicking on the grey line will turn it green and open new options at the bottom. These are where the buttons are displayed, alignment, hints that should show up, which actions to happen on clicking on the button, font types, etc...
Select a sub (childdialog), take Credits for example, you cant do much wrong with this one for the first time.
Try easy first by going to Position & Width. Its format is x & Y, so on a screen resolution the max display would be 1024 @ 768, so pick anything in this range and it will immediately realign. However this is a preview. So to save changes, either save this vitbut.xml and tick 'always load from source' & 'always save to source' and give it a fitting name. Then next go to the top tree (the main dialog ) and save there aswell.
Press ESC to exit, exit menu, restart game and on loading the main menu, the credits button should be in the new position. If you understand this, then its just a matter of a few more try outs and you will understand how it works.
Let's try a few more things out just on this same 'credits menu' button. This time, go to the green option bar named ' Simple Papa' and open up the action menu, open the tree again till you get the options. There you will see that it refers to a .bik file, just change it for example to 2.bik ( the GSC logo) and untick the 'credits' option button.
Again save up 2 times, the childdialog and the main dialog, exit , and restart, next load up on pressing on the credits button it should play the GSC logo movie.
Let's try something else: add a new button in the main menu for the editor.
Note: If you create a new menu, lets say a new button for the editor, you will need to fill out a name for it and define it in the text files so the appropriate text shows up, for example name it #MOD_MAIN_EDITOR and then go to DATA\TEXT\Dialog.txt and create new line with #MOD_MAIN_EDITOR EDITOR.
It is similar to the above procedure, except we will create a new button this time.
Have a look at this tube tutorial on how to pull it off.
Note that there's more involved to get this 'editor' button to fully work ( eg.load&save buttons within the editor,...), this was just to show the possibilities with this editor. You will also want to build a new background interface picture so the new buttons fit etc...
For more information about this editor see here.
As always, save often and make sure before you start doing anything you have back ups to go back to in case you do mess this up.