Stones Editor
This Editor allows you to manipulate about anything that can possibly be done with the various stones in the game ( small stone's, mine's,...)
You can manipulate the appearance and order in the editor itself while you are working in the editor.
Let's start off by something simple. We will slightly reorganize the mine section. There's a copy of all the mine's in there that isnt really necessary and we will put the goldmine on top of the list.
Hit CTRL+E and select the stones editor. Go to the submenu [SECTIONS].
Open up the mine section and delete the last 4 mine's in the list by hitting on the red cross.
Then select the gold mine and use the arrow keys to move it up the list. Click ok
Go to the stone button in the toolbar and notice the changes are automatically done.
Point to note: on exiting the game and restarting it will load up the default rsr file. However changes done and used on a map and on saving that map, it will store those changes to the map.
Hard changes for modding should be done in the rsr file itself.
The main usage of this editor is to visually test and fine tune the various coordinates for the .rsr and .lst file's without having to imagine them and constantly load up your game. Once you get the right settings, write them down in your .rsr and .lst file.
If you are adding new stone's to the game ( new .g17 file) you first should read a bit more about .rsr file's here. Make sure you add them at least to the [SOURCES] for stone's or [INTERNAL SOURCES] for mines.
You should make sure that you add your new stone (mine's) aswell to the stonelist.lst file and more information about this .lst can be found here.
A picture to make things a bit more clear:
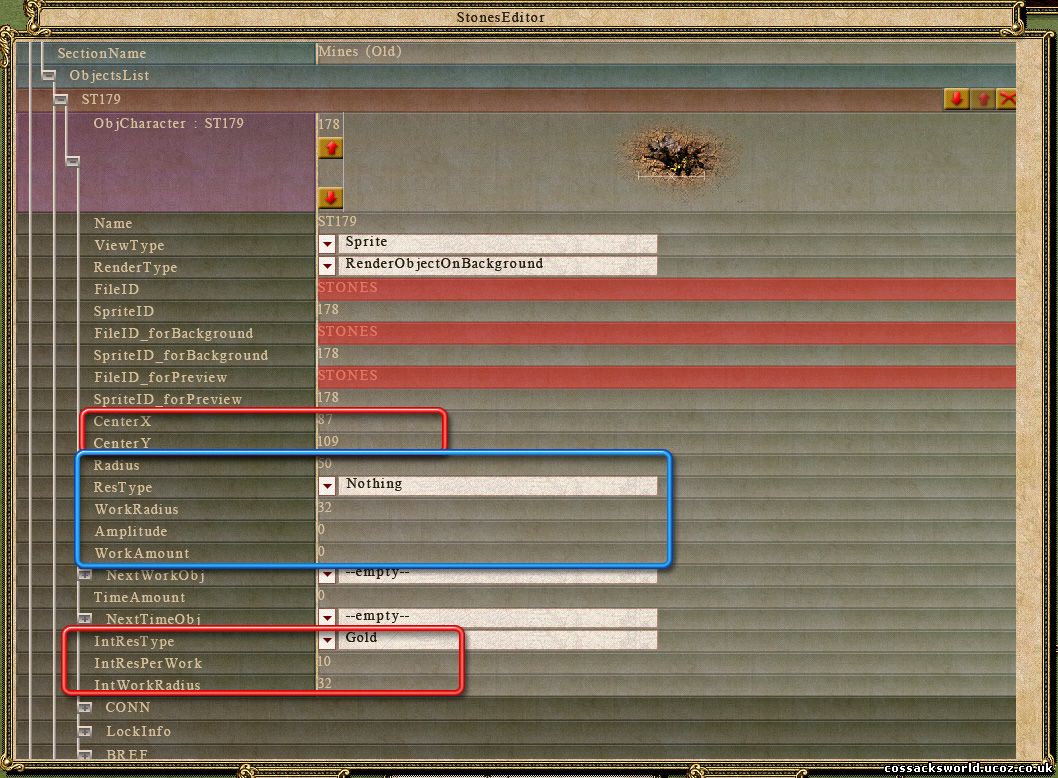
Point to note, it doesnt matter if you open up the resource under the Objects tab or the Section tab, the options are the same.
As you can notice I loaded the gold mine from Cossacks I here.
Most of the options are set up automatically after adding it to your .lst and .rsr file.
Notice the white line with the cross in the middle, this refers to the Center X and Center Y options encircled in red.
Evidently how the resource will appear under the mouse on placing.
The blue encircled section on the picture is for regular stone's.
For mines it's the IntRes [INTERNAL_SOURCE] options encircled in red.
The +NextWorkObject is for trees.
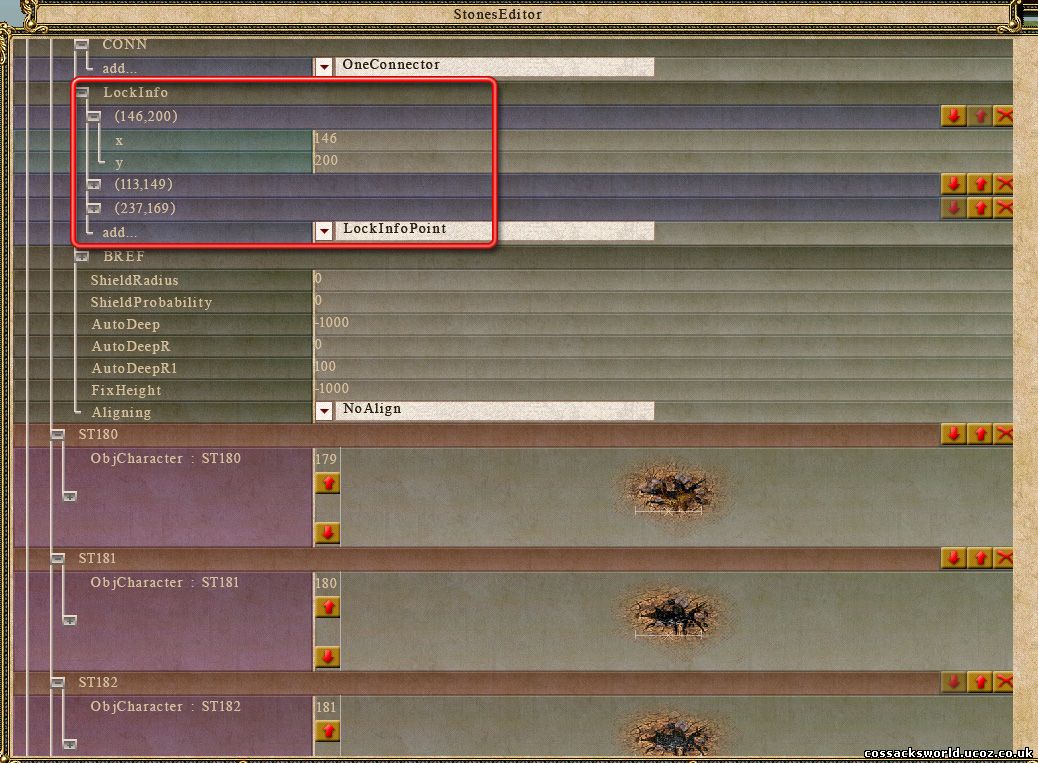
The +CONN information is for wall's.
The +LockInfo is to lock the building over the resource so it doesn't build next to the resource sprite. Don't bother trying to imagine these numbers in the .rsr file but add them here and check back in the editor if the mine builds properly over it. It will need at least 3 x&y coordinates to work properly. 4 is optional depending on the mine building.
The +BREF option i have yet to figure out myself. Probably for trees aswell.