GSC GPArch
1. Installing the GP arch Tool:
Download and extract the GParch tool or find them in the ALL GSC ToOol Pack version 1.01
Place the GpArch directly in the C:directory of your computer! Otherwise the tool will crash.
2. Viewing & extracting .gp file's with Gp Viewer
- After you have extracted your file's with GSC Utility, copy the .gp file you want to view/extract in to the subfolder "GP" of the GPArch.
- Rename the file from xxx.GP to xxx.gp . The lower caps are necessary to extract the file's. If your explorer does not show extensions, go to control panel --> Map options and select show extensions.
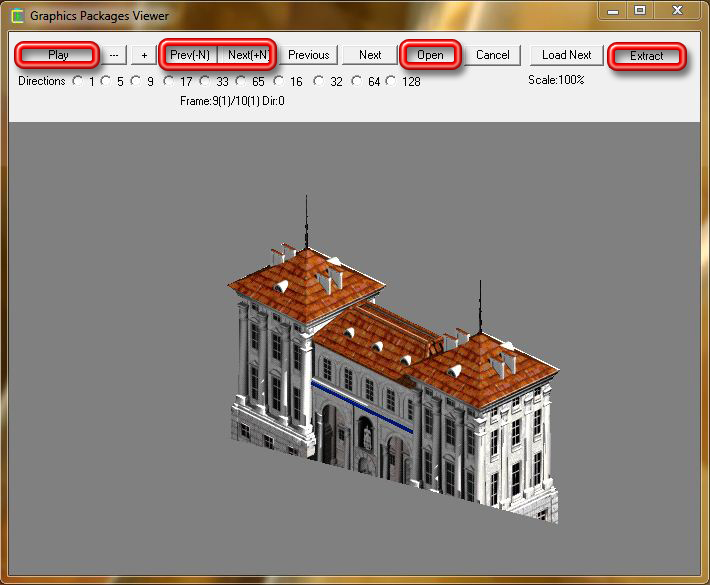
- Run the gpviewer (gpview.exe) which can be found inside your GPArch folder.
- Select Open and direct it to the 'gp' folder where you placed your file.
- Press Play to run the animation.
- Use Previous & Next to go trough the separate frames.
- Press Extract.
- You can find the extracted .bmp file's, the identical copies ( alphachannels) and the .lst file inside the " extracted " folder of your GPArch.
Note:
If you get blury colors then you are using the wrong palette folders. The Gp tool has been modified to mod American Conquest, so in order to see the gp files for cossacks properly you want to change the folders 0 and 1. Simply take them from the Cossacks ALL.GSC and replace them with those in the GpArch or delete the folder 0 & 1 in the gparch and replace them with the folders 0 & 1 from the subfolder "For Cossacks".
3. Creating .gp file's with MegaPack
- Prepare a folder with your .bmp's and an .lst file listing the bmp's.
- Run MegaPack.exe which can be found in the GPArch.
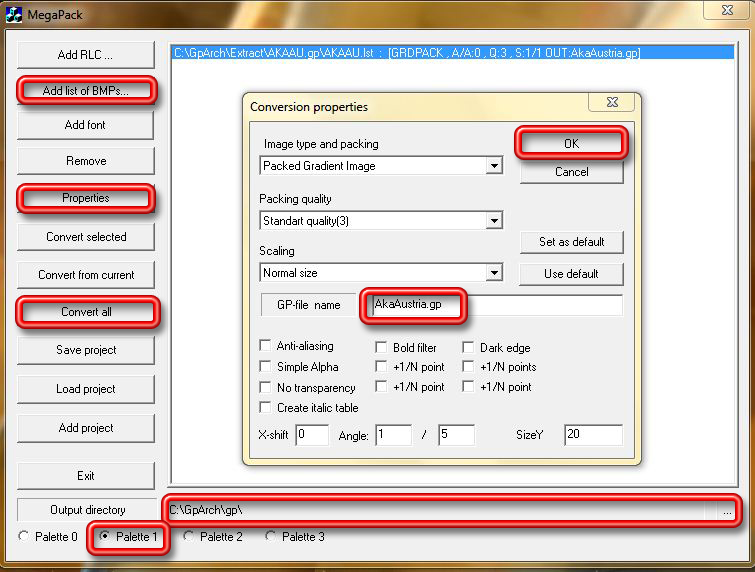
- Press "Add list of BMP's" and direct it to your .lst file
- In conversion properties fill out the name of the .gp file.
- Select any conversion options you need ( scaling,...) , otherwise, leave everything default.
- In the main screen, check the output folder to direct it where you want the file to appear.
- Select palette 1 for Cossacks.
- Press convert all.
- After it has finished creating the file you can find the new .gp file in the output folder.
4. Additional information on the GpArch tools:
Inside the GPArch there are additional tools.
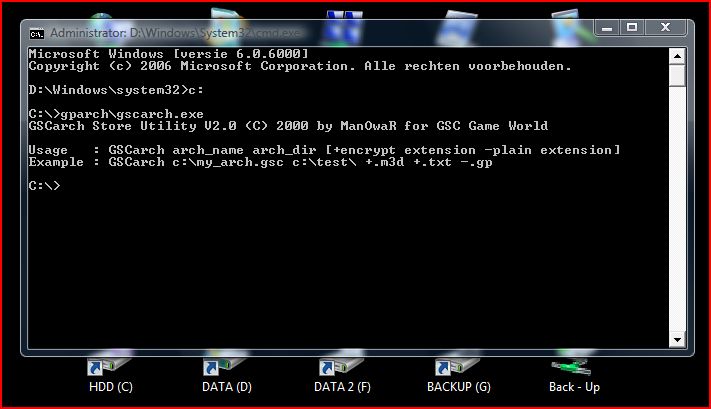
One of them is GSCArch.exe. This tool allows you to pack up your modified file's just like GSC Utility does, but it's not so easy to use.
GSCarch !where_to_create_file "mods01.gs1" or "mods.gs1"! !what_to_archive! and then you have to add this string
" -.gp +.grd +.pal +.xlt +.set +.dat +.lst +.rsr +.bpx +.rlc +.dat +.bmp +.msk +.gpi +.set +.msp +.smp +.sty +.pix +.ads +.cd +.nds +.txt +.md +.lnk +.terr +.cml"For example, GSCarch C:\Cossacks_EBELMOD\Mods.GS1 C:\Cossacks_EBEL_MOD\_BAT\MODS\ -.gp +.grd +.pal +.xlt +.set +.dat +.lst +.rsr +.bpx +.rlc +.dat +.bmp +.msk +.gpi +.set +.msp +.smp +.sty +.pix +.ads +.cd +.nds +.txt +.md +.lnk +.terr +.cml
Make use of GSCarch.exe to archive all large files that were changed (all files but *.md and *.nds and *.lst *.ads *.txt *.rsr *.dat)
For example, GSCArch C:\Cossacks_EBELMOD\Mods.GS1 C:\Cossacks_EBELMOD\_BAT\MODS\ -.gp +.grd +.pal +.xlt +.set +.bpx +.rlc +.bmp +.msk +.gpi +.set +.msp +.smp +.sty +.pix +.cd +.lnk +.terr +.cml
into file mods.gs1
and all *.md and *.nds and *.lst *.ads *.txt *.rsr *.dat into mods01.gs1Don't right click on the gscarch and run as admin. Instead go to the windows archand type cmd in the search box. When it appears in the list right click on cmd and run as administrator
You can also use it to view *.gp file's. Type in the command line "C:\GpArch\GPView.exe" where "C:\GpArch\gp\myproject.gp" is a path to your *.gp file