Adding New Buildings
Part I: Basic implementation of the building.
Initial notes:
- I tried this with another building first, but for the purpose of this guide I'll use HugoJackson18's castle which is available to all of you. Get it here: https://drive.google.com/file/d/0B6-HjHGVgDRmR2oxczhaTW5tNUE/view
- You will also need a text editor, I use sublime text, but you could use notepad ++ as well.
- We'll keep it simple, and just add the building to the mission nation, so it can be placed in game in the editor.
- We will use the blockhouse as a reference to copy files from. This will speed up the implementation of the building greatly.
- It is best that you use the same name everywhere for the building, it will be less confusing, and you'll make less mistakes. So, let's name this building "miscas".
Basic steps:
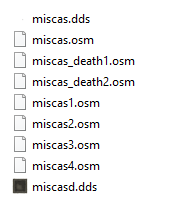
1. Extract the castle.osm and castl_diffuse.dds from the .rar you downloaded. Rename both, to miscas.osm and miscas.dds
2. Put miscas.osm into Cossacks 3\data\actors\buildings\mis\
3. Put miscas.dds into Cossacks 3\data\materials\buildings\mis\
4. Copy Cossacks 3\data\actors\buildings\mis\misblg.actor and paste it in the same folder. Rename it to miscas.actor
5. Open Cossacks 3\data\actors\buildings\mis\miscas.actor. Replace all the lines where it says "LoadFromFile = .\data\actors\buildings\mis\misblg." with 'miscas'. Pay attention here, since we don't have a 'death stage' for this building (yet) ensure you replace following 2 lines properly:
LODList.Items[0].MeshObjects.LoadFromFile = .\data\actors\buildings\mis\misblg_death1.osm
LODList.Items[0].MeshObjects.LoadFromFile = .\data\actors\buildings\mis\misblg_death2.osm
Ensure the _death part is gone:
LODList.Items[0].MeshObjects.LoadFromFile = .\data\actors\buildings\mis\miscas.osm
Then save your file.
Note: If you do have deathstages/buildstages for your building, then you would add those .osm file names here. (See step 24.)
6. Open Cossacks 3\data\actors\actors.lib. Find (CTRL+F) 'Misblg'. Copy the section:
section.begin {refurl=.\data\actors\ref\refactors.lib; refkey=buildings}
LODActorName = misblg
LODActorFileName = .\data\actors\buildings\mis\misblg.actor
section.end
Paste it at the bottom of the file and replace both instances of 'misblg' with 'miscas'
section.begin {refurl=.\data\actors\ref\refactors.lib; refkey=buildings}
LODActorName = miscas
LODActorFileName = .\data\actors\buildings\mis\miscas.actor
section.end
Save the file.
7. Open Cossacks 3\data\materials\buildings\buildings.mat . Find 'misblg' Copy the section. Paste it at the bottom and ensure the names are changed to:
section.begin {refurl=.\data\materials\ref\refbuilding.mat}
Material.Name = miscas
Material.Texture.image = .\data\materials\buildings\mis\miscas.dds
Material.Texture.textureformat = tfDefault
section.end
Save the file.
8. Find Cossacks 3\data\objects\buildings\misblg.prop , copy it and rename the copy to miscas.prop
9. Open Cossacks 3\data\objects\buildings\miscas.prop , find and replace all instances of 'misblg' with 'miscas'. Save the file.
10. Open Data\objects\buildings\buildings.objects , and find the line:
ObjectItems[*].PropertiesFileName=.\data\objects\buildings\misblg.prop
Copy it, paste it just before section.end at the bottom and change misblg to miscas. Save.
11. Open data\scripts\lib\units.script. Find following line: "//if (mis) then". The mission nation buildings are right below it. Find the following line and add the 'miscas' to it so it looks like this:
case objprop.sid of
'misblg', 'misblg2', 'miscas' : begin
You could ofcourse also copy the entire 'misblg' section, paste it under it and make adjustments to the building properties here ( HP, price, etc) . Let's not bother with that for now.
12. Open data\scripts\lib\country.script and find '// MEMBERS'.
The mission nation is right below it. Copy the line with 'misblg' and paste it under it. Change the name to miscas.
_country_AddMember(country, 'miscas', ind, True, gc_country_editorplace_category_buildings, 15, gc_ai_unit_none);
13. Open Data\hud\hud.mat . Find:
section.begin {refurl=.\data\hud\ref\reflibmat.mat}
Material.Name = icons.bld.eurtow
Material.LibTextureName = icons
Material.TextureCoord.ImageW = 1024
Material.TextureCoord.ImageH = 512
Material.TextureCoord.CoordX = 230
Material.TextureCoord.CoordY = 92
Material.TextureCoord.CoordW = 46
Material.TextureCoord.CoordH = 46
section.end
Copy it, paste at the bottom and change to:
Material.Name = icons.bld.miscas
Save.
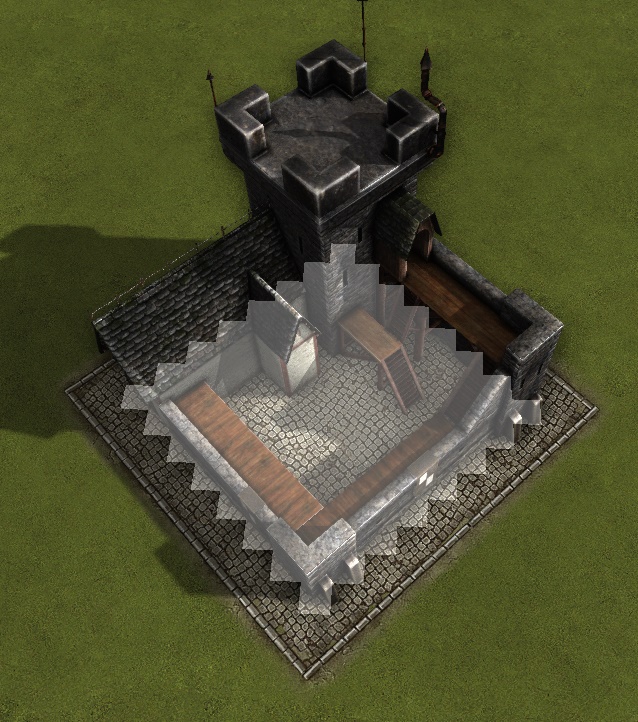
14. Now we have done the bare minimum to get a new building in game, it should be placeable in the editor. So test if you did everything right. Go into the editor, look for the 'originals' nation and if you did everything right, your new building should be there.
Additional notes:
- I urge everyone to take a copy of your \Steam\steamapps\common\Cossacks 3 folder, and copy it on your desktop. Work on this copy, so an update from a patch doesn't overwrite your files or when you derp you don't have to reinstall files.
- Take advantage of the external editor , rather than using the internal editor. If you mess up, you will get a black screen with the ingame editor, and you will be none the wiser what happened. If you use the external editor, the debug log will tell you that something has gone wrong, and usually what has gone wrong. Sometimes it will even tell you in which file and which line there is something wrong.
I made at least 3 mistakes while doing this , in one occasion I simply forgot to save my changes, and without the debug screen, you could spend an hour trying to figure it out.

- Yes, the building is rotated wrong, and many many more things will be needed to get this building setup properly, but these were just the basic steps on how to get the new building ingame. Build points will have to be setup, collision mask, collision box, smokepoints, text description, building properties, decals and then later assign it to a proper nation, add it to the peasants building menu,....but that's for the next parts of the guide.
Part II: Adding a description, rotate/scale, smoke points and ground texture
Notes:
- Get the new castle files here: https://drive.google.com/file/d/0B6-HjHGVgDRmekpCV3cyY3NGd3c/view
- [Optional] Since we used the name 'miscas' in the first part of the guide, rename the files you just downloaded to 'miscas' to keep it simple in the naming:
If you don't rename them, then make sure you use the correct names when implementing.
15. We'll start simple, with a description for the building. I have no interest in translating it to every language ingame, so we'll add the description in the 'en' folder.
Find: Cossacks 3\data\locale\en\units.txt
Open it and add at the bottom of the file:
@miscas
Castle
@miscas.ext
%def%Fortification.
%include(units;descr.canshoot)%
%pos%Can only be destroyed by cannons, ships, grenadiers or archers.
Save the file.
Next go to Cossacks 3\data\locale\txt_to_lng.bat . Open it (rightclick->open as) and at the bottom add following line:
..\..\tools\locale\editorlang.exe .\en\units.txt .\en\units.lng c
Save and close.
Now run the batch file by double clicking on it.
If you did everything right in the editor it should show 'Castle' now instead of 'miscas'
16. Lets rotate the building a bit, and rescale it a bit aswell just so you know how. Put the castle model (miscas.osm) from castle_02.zip into your Cossacks 3\data\actors\buildings\mis\ folder because Hugo seems to have rotated the model in the second pack. Just overwrite the existing one.
Next: Go to Cossacks 3\data\objects\buildings\miscas.prop
Open it and at the bottom find following lines and adjust:
scaleproperty : section.begin {refurl=.\data\objects\ref\refbuilding.prop; refkey=scaleproperty}
DefaultScale.X = 0.4
DefaultScale.Y = 0.4
DefaultScale.Z = 0.4
section.end
directionupproperty : section.begin {refurl=.\data\objects\ref\refbuilding.prop; refkey=directionupproperty}
DefaultRollAngle = 315
section.end
17. Lets work a bit on the 'selection box', because this was based on the misblg, which is smaller.
This will also help with the collision so we don't have soldiers strolling on the inner courtyard.
Load up the editor (editor.exe) . We'll place the building right here (Add a player in Advanced - Player -> Add a player, and select "Race" buildings.)
Then go to Layer - Players (CTRL+ALT+U)-> Click on "buildings". A tree will open will all the buildings. Place the building on the map. Press the spacebar to stop placing.
Now go to View- Universal manipulator, and tick on "Bounding box and CustAABBinSP" in the top section.
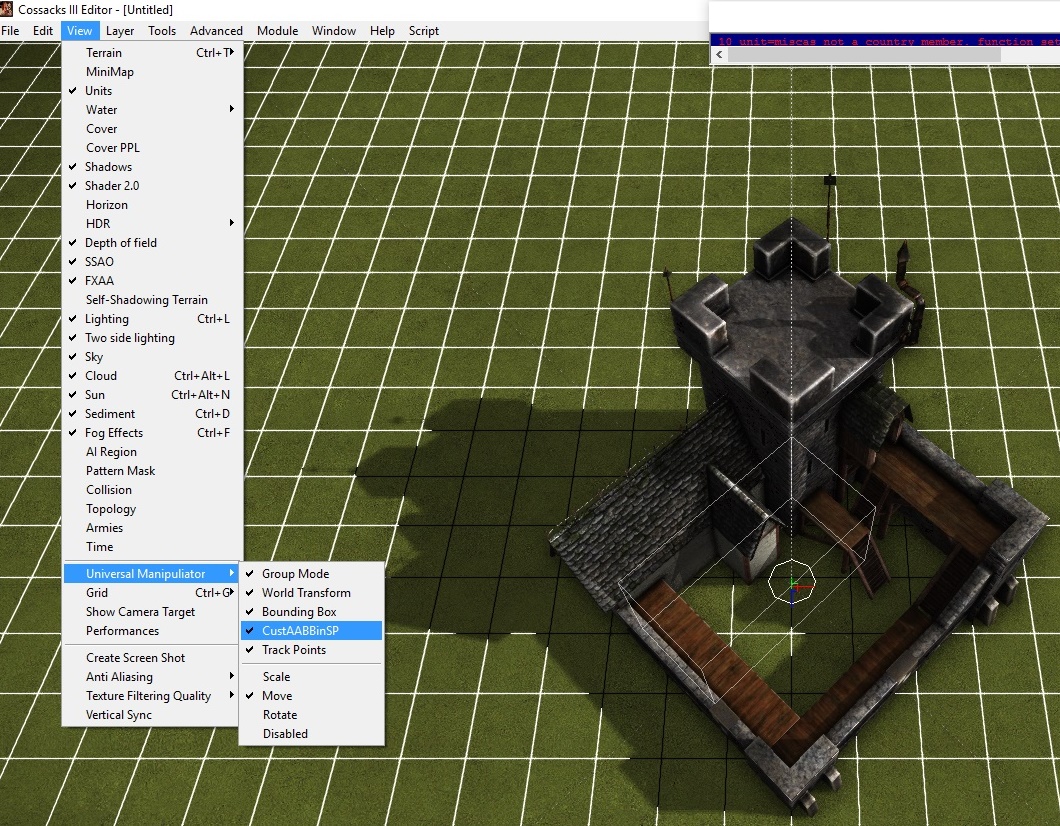
When dragging over the building to select it, you will instantly see the blockhouse selection box appear. We have to fix this up to match this new building.
We'll do this manually. Go to Cossacks 3\data\objects\buildings\miscas.prop and add:
collisionmeshproperty : section.begin {refurl=.\data\objects\ref\refbuilding.prop; refkey=collisionmeshproperty}
CustomBoundingAABBMin.X = -2.55
CustomBoundingAABBMin.Y = 0.00
CustomBoundingAABBMin.Z = -2.55
CustomBoundingAABBMax.X = 2.55
CustomBoundingAABBMax.Y = 3.00
CustomBoundingAABBMax.Z = 2.55
section.end
It's not perfect but at least the box is larger now and easier to select. You can tweak the numbers more, but I'm sure GSC will release a tool/script to get these values more accurately.
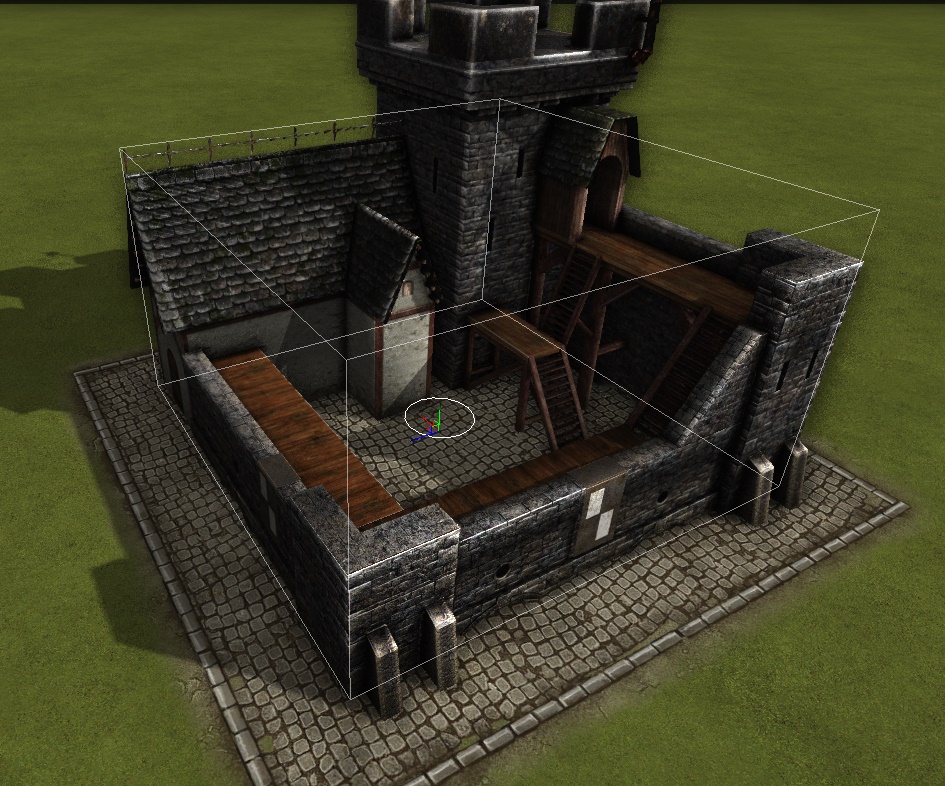
Note: Don't make the selection box too high, or you'll have situations where a small building behind this building becomes unselectable without rotating the camera. (= Don't include the tower in the box)
18. Let's put a ground texture under the building now (Decal)
Get the ground texture (miscasd.dds) from the castle_02.zip and put it in:
Cossacks 3\data\terrain\decals\buildings\
Open Cossacks 3\data\terrain\decals\decals.lib
At the bottom paste following :
section.begin {refkey=default}
name = miscasd
Decal.material.libmaterialname = miscasd
Decal.SummerLibMaterialName = miscasd
Decal.width = 12
Decal.height = 12
section.end
Open Cossacks 3\data\terrain\decals\decals.mat
Same thing, add:
section.begin {refkey=default}
Material.Name = miscasd.dds
Material.Texture.image = .\data\terrain\decals\buildings\miscasd.dds
section.end
Go to Cossacks 3\data\game\var\objcustom.cfg
Add at the bottom before section.end :
[*] : struct.begin
sid = miscas
Decal : struct.begin
scale = 20
offx = 0
offy = 0
angle = 0 //I think it needs 180 here, i forgot to change/test
struct.end
struct.end
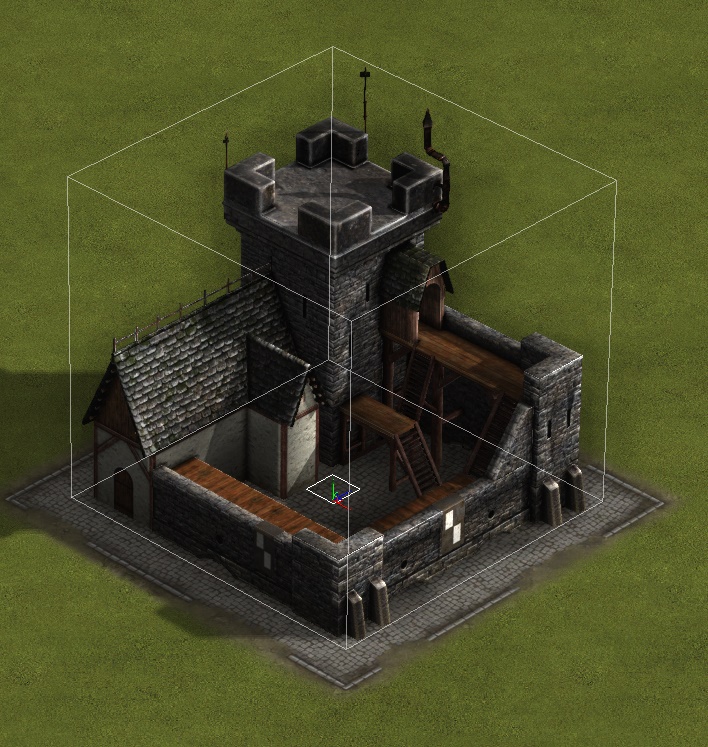
Looking nice already now:
19. Lets add some smoke points now so its more visible if it is under attack.
Cossacks 3\data\game\var\objcustom.cfg
Find the section we just added in previous step.
Add following:
[*] : struct.begin
sid = miscas
Decal : struct.begin
scale = 20
offx = 0
offy = 0
angle = 0
struct.end
SmokePoints : struct.begin
[*] : struct.begin
px = -0.34
py = 2.40
pz = -1.41
nx = -0.70710676908493
ny = 0
nz = 0.70710676908493
struct.end
[*] : struct.begin
px = 0.09
py = 2.00
pz = -1.10
nx = 0.70710676908493
ny = 0
nz = 0.70710676908493
struct.end
struct.end
struct.end
It's not perfect, but doing this manually is tedious. I wont add anymore smoke points because of this.
I'm sure gsc will release an editor/Script to add these.
Note: You can see these points in the editor, if you select the building, and then go to Scripts-> Smokepointshowpickedbuilding.
In this same file you can add exit points, but since the castle doesn't really have an 'open' door for units to come out, I won't.
Part III: Adding Collision mask, Shot points, Properties, Build and Death Stages.
20. Let's setup the collision mask .
In editor you can see the collision mask by going to View - Collision.
Go to Cossacks 3\data\objects\buildings\miscas.prop and add:
collisionmaskproperty : section.begin {refurl=.\data\objects\ref\refbuilding.prop; refkey=collisionmaskproperty}
Priority = 101
Mask : struct.begin
[*] = 0000000010000000
[*] = 0000000111000000
[*] = 0000001111100000
[*] = 0000011111110000
[*] = 0000111111111000
[*] = 0001111111111100
[*] = 0011111111111110
[*] = 0111111111111111
[*] = 0011111111111110
[*] = 0001111111111100
[*] = 0000111111111000
[*] = 0000011111110000
[*] = 0000001111100000
[*] = 0000000111000000
[*] = 0000000010000000
struct.end
section.end
21. Now, although it's using the properties of the blockhouse, it can't shoot yet untill we add shotpoints.
Go to Cossacks 3\data\game\var\objcustom.cfg and add to the 'miscas' section:
ShotPoints : struct.begin
[*] : struct.begin
x = -0.10
y = 2.10
z = -1.10
bcustomdir = True
minangle = 1
maxangle = 89
struct.end
[*] : struct.begin
x = -0.34
y = 2.42
z = -1.41
bcustomdir = True
minangle = 90
maxangle = 179
struct.end
[*] : struct.begin
x = -0.10
y = 2.10
z = -1.10
bcustomdir = True
minangle = 180
maxangle = 269
struct.end
[*] : struct.begin
x = -0.34
y = 2.42
z = -1.41
bcustomdir = True
minangle = 270
maxangle = 360
struct.end
struct.end
They are not perfect, but it's too tedious to do this manually. It will be able to shoot in all directions now.
22. Let's add it to a peasants build menu in the mis nation.
Go to Cossacks 3\data\scripts\lib\country.script. Search for // MEMBERS and scroll down a few lines untill you see:
var member : String = 'peaaus';
var fixedproduceind : Integer = _country_GetFixedProduceIndexBySID(cid, member, bAddIfNotExist);
if (fixedproduceind<>-1) then
begin
_country_AddFixedProduceWithAccessControl(country, fixedproduceind, member, 'misblg', 6, 0, ind, '', '', '');
_country_AddFixedProduceWithAccessControl(country, fixedproduceind, member, 'misblg2', 7, 0, ind, '', '', '');
_country_AddFixedProduceWithAccessControl(country, fixedproduceind, member, 'miscas', 8, 0, ind, '', '', '');
end;
Make sure to add the line with 'miscas' as shown above.
23. Lets give our building its own properties now.
Go to Cossacks 3\data\scripts\lib\units.script
Find:
case objprop.sid of
'misblg', 'misblg2', 'miscas' : begin
Now delete the , 'miscas' part which we added in previous part of the guide.
Add following under the miscommandcenter section:
'miscas' : begin
SetObjBuildingBaseSettings(objprop, False, 500, gc_obj_usage_tower); {capture,score,usage->will show bombard area icon}
SetObjBasePrice(objbase, 0, 5000, 5000, 15000, 2500, 2500); {food, wood, stone, gold, iron, coal}
SetObjBuildingProperties(objprop, objbase, 50000, 4500, 300); {hitpoints,buildtime,costpercent}
SetObjBaseMaterialCanKill(objprop, gc_obj_material_building, gc_obj_material_body, gc_obj_material_wood, gc_obj_material_woodwall, gc_obj_material_iron, gc_obj_material_building); {is building, and can kill everything listed after}
//{SetObjBaseWeapon(objprop, objbase, 0{index}, 55{damage}, 25{pause}, 200{minradius}, 550{maxradius}, 350{detectradiusmin}, 550{detectradiusmax}, gc_obj_weapon_kind_bullet, True{bsearchminattackradius});
//objprop.weapon[0].weaponsid := 'SHOTBLOCKHOUSE'; {other weapon ids can be found in : Cossacks 3\data\scripts\lib\weapon.script }
//objprop.weapon[0].cost[gc_resource_type_iron] := 3; {cost per shot}
//objprop.weapon[0].cost[gc_resource_type_coal] := 3; {cost per shot}
//objprop.weapon[0].fxshot := 'shotmusketpoint'; {visuals}
SetObjBaseWeapon(objprop, objbase, 0{index}, 1000{damage}, 200{pause}, 550{minradius}, 1200{maxradius}, 550{detectradiusmin}, 50000{detectradiusmax}, gc_obj_weapon_kind_cannonball, True{bsearchminattackradius});
objprop.weapon[0].weaponsid := 'PPOINTTTOW';
objprop.weapon[0].cost[gc_resource_type_iron] := 5; {cost per shot}
objprop.weapon[0].cost[gc_resource_type_coal] := 10; {cost per shot}
objbase.weapon[0].dispertion := _misc_PixelsToTiles(75); {inaccuracy}
objprop.weapon[0].fxshot := 'shottower'; {visuals}
objprop.bartprepare := True; {shows loading bar in gui between shots}
objprop.consume[gc_resource_type_gold] := 500; {maintenance cost}
objprop.bmercenary := True; {will mutiny if no more gold}
objprop.bturnoff := True; {stops shooting if no resources}
objprop.searchradius := _misc_PixelsToTiles(1000);
objprop.vision := 4; {how far it clears fog of war}
objprop.bshowdelay := True;
objprop.explradius := _misc_PixelsToTiles(1);
objprop.farm := 150; {adds 150 pop cap}
objprop.bslowdeath := True;
end;
It shoots like a tower now, rather than a blockhouse, I left the blockhouse weapons in there though, just in case you want those.
24. Let's add the build and deathstages now.
24.1 Grab following files you downloaded and renamed:
miscas1.osm, miscas2.osm, miscas3.osm, miscas4.osm, miscas_death1.osm, miscas_death2.osm
Put all these in Cossacks 3\data\actors\buildings\mis\
24.2 Go to Cossacks 3\data\actors\buildings\mis\miscas.actor
We'll add the buildstages and deathstage files here, adjust so it looks like this:
section.begin {refurl=.\data\actors\ref\refbuilding.actor}
ActorList.Items[0].Name = miscas.mesh
ActorList.Items[0].LODList.Items[0].MeshObjects.LoadFromFile = .\data\actors\buildings\mis\miscas.osm
ActorList.Items[*] : struct.begin {refurl=.\data\actors\ref\refbuilding.actor; refkey=.ActorList.Items[0]}
Name = miscas1.mesh
LODList.Items[0].MeshObjects.LoadFromFile = .\data\actors\buildings\mis\miscas1.osm
struct.end
ActorList.Items[*] : struct.begin {refurl=.\data\actors\ref\refbuilding.actor; refkey=.ActorList.Items[0]}
Name = miscas2.mesh
LODList.Items[0].MeshObjects.LoadFromFile = .\data\actors\buildings\mis\miscas2.osm
struct.end
ActorList.Items[*] : struct.begin {refurl=.\data\actors\ref\refbuilding.actor; refkey=.ActorList.Items[0]}
Name = miscas3.mesh
LODList.Items[0].MeshObjects.LoadFromFile = .\data\actors\buildings\mis\miscas3.osm
struct.end
ActorList.Items[*] : struct.begin {refurl=.\data\actors\ref\refbuilding.actor; refkey=.ActorList.Items[0]}
Name = miscas4.mesh
LODList.Items[0].MeshObjects.LoadFromFile = .\data\actors\buildings\mis\miscas4.osm
struct.end
ActorList.Items[*] : struct.begin {refurl=.\data\actors\ref\refbuilding.actor; refkey=.ActorList.Items[0]}
Name = miscas_death1.mesh
LODList.Items[0].MeshObjects.LoadFromFile = .\data\actors\buildings\mis\miscas_death1.osm
struct.end
ActorList.Items[*] : struct.begin {refurl=.\data\actors\ref\refbuilding.actor; refkey=.ActorList.Items[0]}
Name = miscas_death2.mesh
LODList.Items[0].MeshObjects.LoadFromFile = .\data\actors\buildings\mis\miscas_death2.osm
struct.end
section.end
24.3 Grab the miscas.dds file from the castle_02.zip we renamed and put it in Cossacks 3\data\materials\buildings\mis\
25. Time to try in the editor. It should be fully operational now. It can be built, it can shoot, it can be attacked.
Additional notes:
- There are actually scripts to visually adjust the selection box:
// Go to Script and look at all the AABB options there. Use the hotkeys to resize the box to match the building.
// Hotkeys: CTRL/ALT+F1-F12
// You will want to rotate the building often to see that it matches the walls roughly.
// Sadly no way to save these points apparently or I simply haven't figured out how. If someone feels like figuring this out, please do, it would save a lot of time.
- I Would have added an art depot index in the properties so it would add space for cannons, but the gui is very derpy:
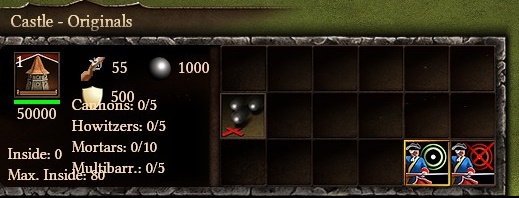
Not impossible to change, but not really related to this guide.
Credits:
- HugoJackson18 for the building; version 3 of the building can be found here : https://drive.google.com/file/d/0B6-HjHGVgDRmMnljbWZCRW9Eb2s/view
- Setakat for the guide on cloning units, which has been helpful to make this somewhat easier to figure out.